Budget-Friendly and Time-Conscious Thanksgiving Tips & Recipes

para español

Thanksgiving is an exciting time to eat some of our favorite holiday foods. We could go on and on about Thanksgiving fare, but the reality is that making too many dishes can be stressful! Check out the following tips to spend less time and money in the kitchen.

  1. Keep it simple by focusing on favorites – choose your favorite 2 vegetable sides & 1-2 starchy side dishes to make and enjoy without going overboard. You can make other dishes any day of the year without the pressure of the big day!
  2. Make only what you will need – Thanksgiving leftovers are great, but buying too much can put you over budget and creates waste.
  3. Basic is best – Often our favorite recipes are the most simple. Choose recipes without extra ingredients. This saves time shopping AND in the kitchen. Making dishes from scratch is often less expensive too.

When it comes to Thanksgiving, thinking ahead can save the day!

Giving ourselves time to decide what’s really important minimizes holiday stress. Prioritizing can keep us focused and on-track to stay within budget and to make healthier choices.

  1. Prioritize only a few of your “Must-Have” favorite dishes and choose recipes in advance. You can make other dishes any day of the year.
  2. Purchase November’s in-season produce while it’s at the lowest price and its peak of freshness (winter squashes, collards, cabbage, sweet potato, kale, carrots, apples, cauliflower, Brussels sprouts, cranberries etc.)
  3. Make it ahead. Schedule a prep day where you can get some foods done in advance. Many can be stored in the freezer for weeks and just need to be reheated (soup, casseroles, pie, etc.)
  4. Use a slow cooker if you have one. Many recipes can be adapted to be made in a slow cooker. It takes up little space and reduces your active cooking time.
  5. Poultry swap. Turkey is often the most expensive item at Thanksgiving. Cut the cost by:
  • Purchasing store-brand turkey
  • Choosing a smaller bird and focus on the side dishes
  • Substituting chicken and prepare it with the same care you would for a turkey
  • Buying turkey pieces instead of the whole bird
Roasted Turkey Breast

For when you don’t want to cook a whole bird (try it with chicken!)

  • 5 lbs Turkey Breast, bone in & skin on
  • 2 tbsp Butter, softened
  • 2 large Garlic Cloves, minced
  • 1 tbsp Rosemary
  • 1 tsp Smoked Paprika
  • 2 tsp Salt
  • Black Pepper, to taste
  • 3 cups Water

Instructions:

  1. Preheat oven to 450 degrees F.
  2. In a small bowl, add softened butter, garlic, rosemary, smoked paprika, salt & pepper. Mix thoroughly.
  3. Rub turkey breast with seasoned butter all around, starting from the bottom with bone side.
    Place turkey breast side up on a rack and then put rack inside the baking dish. Pour water into the pan underneath the turkey.
  4. Bake uncovered for 20 minutes on a bottom rack.
  5. Loosely cover with foil and bake for 70-80 minutes more or until internal temperature in the deepest part of meat reaches 150 – 155 degrees F.
Cranberry Sauce

For a more naturally sweetened sauce

  • 12 oz Cranberries, fresh or frozen

  • 1/3 Cup Maple Syrup or Honey

  • 1/4 Cup Orange Juice (use zest of oranges if fresh)

  • 1/8 tsp Vanilla (optional)

  • 1/8 tsp Cinnamon (optional)

Instructions:

  1. Add cranberries, syrup or honey, and orange juice to a pot.
  2. Cover and bring to a boil. Then reduce heat to medium and cook for 6 more minutes.
  3. Remove lid and add vanilla & cinnamon (optional). Stir and cook for another 3 minutes or until cranberries are broken down and the sauce has thickened.
Thanksgiving Stuffed Acorn Squash

For a new dish to serve featuring seasonal vegetables.

For the Squash

  • 3 Acorn Squash, small

  • 1 Tbsp Olive Oil

  • Salt & Pepper, to taste

For the Stuffing

  • 1 Onion, chopped
  • 3 Garlic Cloves, minced
  • 1 Tbsp Olive Oil
  • 1 lb Lean Turkey, ground
  • 3 Cups spinach/kale, chopped
  • 2 tsp Dried Rosemary
  • Salt & Pepper to taste
  • Hard Cheese & Parsley for garnish (optional)

Instructions:

  1. Cut squash in half and scoop out the seeds. (save them to toast later)
  2. Place squash cut side up on a large baking sheet. Brush with 1 tbsp of oil and sprinkle with salt and pepper. Bake for 30 minutes.
  3. In the meantime, prepare the stuffing. Place a large skillet over medium-low heat.
  4. Add oil onion and garlic and cook until translucent and fragrant. Add turkey and cook for another 7-8 minutes while mixing and breaking up the meat.
  5. Add remaining ingredients. Mix together and cook for another few minutes.
  6. After the squash have roasted for 30 minutes, remove them from the oven. Carefully stuff the centers with the stuffing & sprinkle on cheese (optional).
  7. Return the stuffed squash to the oven and bake another 25-30 minutes until the top is golden brown and the squash can be easily pierced with a fork.
Toasted Acorn Squash Seeds

For a crunchy & salty snack while waiting for dinner.

  • Acorn Squash Seeds

  • Oil of your choosing, enough to lightly coat

  • Salt, to taste

Instructions:

  1. Heat oven to 350 degrees F and line a baking tray with foil.
  2. Remove squash pulp from seeds as best as possible.
  3. In a bowl, drizzle oil onto the seeds to lightly coat. Add salt and mix.
  4. Spread the seeds on your baking sheet in a single layer and place into the oven.
  5. Bake for 15-20 minutes, tossing the seeds with a spatula once or twice during the cooking time.
  6. Remove once they are golden and fragrant.
Garlic Green Beans

For a deliciously simple vegetable side dish.

  • 1.5 lbs Fresh Green Beans, ends trimmed

  • 3 Tbsp Water

  • 2 Tbsp Olive Oil

  • 3-4 Garlic Cloves, minced

  • Salt & Black Pepper to taste

Instructions:

  1. Preheat large ceramic non-stick skillet on medium heat.
  2. Add green beans and 3 tbsp water. Cover and cook for 4 minutes.
  3. Remove the lid and if there is any water left, cook green beans until water has evaporated.
  4. Push beans to the side. Add olive oil and garlic. Cook for 30 seconds and then stir with green beans. Season with salt & pepper.
Roasted Brussels Sprouts

For a traditional & simple seasonal vegetable side.

  • 2 lbs Brussels Sprouts, fresh

  • 3 Tbsp Olive Oil

  • Salt & Black Pepper to taste

Instructions:

  1. Preheat oven to 400 degrees F and line a baking sheet with foil.
  2. Trim the ends and remove outer leaves from brussels sprouts.
  3. Place brussels sprouts on baking sheet, drizzle with olive oil, sprinkle with salt and pepper.
  4. Mix with hands to evenly coat with oil and seasonings. Spread into a single layer.
  5. Bake for 40 mins, tossing with a spatula 1-2 times after the 30 minute mark.
Slow Cooker Mashed Potatoes

For a hassle-free slow cooker recipe (try it with sweet potatoes!)

  • 5 lbs Potatoes, peeled & cut into 1-inch cubes

  • 1/2 Cup of Lowfat or Plant-Based Milk

  • 1/2 Cup Low-Sodium Broth

  • 3 Garlic Cloves, smashed

  • 1/3 Cup Plain Greek Yogurt

  • 1/4 Cup Parmesan Cheese, grated

  • Salt & Black Pepper to taste

  • Sliced Green Onions or Chives for garnish (optional)

Instructions:

  1. Place potato cubes along with milk, broth, salt, black pepper, and garlic into a slow cooker. Toss to combine.
  2. Cover the crock and cook for about 3-4 hours on high or 6-8 hours on low.
  3. When the potatoes are tender, mash them directly in the slow cooker to your desired consistency.
  4. Add yogurt and grated parmesan, and season to taste.
  5. Place the lid back on the crock pot and heat through for another 15-20 minutes before serving. Garnish if desired.
Seasonal Squash Soup

For a hearty seasonal soup you can make ahead (try with any winter squash!)

  • 1 Butternut Squash,  peeled, seeded, & cubed (save your seeds to toast later)
  • 2 Tbsp Oil
  • 1 Onion, chopped
  • 1 Stalk Celery, chopped
  • 1 Medium Carrot, chopped
  • 32 oz Low-Sodium Broth
  • Salt & Black Pepper, to taste

Instructions:

  1. Add oil to a large soup pot. Add onion, celery, carrot and squash and cook for 5 minutes, or until lightly browned.
  2. Pour in enough of the chicken stock to cover vegetables. Bring to a boil then reduce to low heat and cover. Simmer for 40 minutes, or until all vegetables are tender.
  3. Carefully, transfer the soup to a blender (or use an immersion blender), and blend until smooth.
  4. Mix in any remaining stock to attain desired consistency. Season with salt and pepper.

If Freezing…

  1. Allow soup to cool, and then pour into a freezer-safe container. Leave space at the top for expansion.
  2. Place in the freezer until ready to use.
  3. Thaw overnight in the refrigerator if desired. Reheat in a pot on the stove.
Baked Apples

For a healthy dessert that highlights beautiful seasonal apples.

  • 4 Large Apples

  • 3 Tbsp Unsalted Butter, softened

  • 1/4 Cup of Brown Sugar or Honey

  • 1/2 tsp Ground Cinnamon

  • 1/8 tsp Ground Nutmeg

  • 1/3 Cup Whole Rolled Oats

  • 2 Tbsp Raisins/Dried Cranberries/Chopped Nuts (optional)

Instructions:

  1. In a bowl, mash butter, sugar/honey, oats, cinnamon, and nutmeg together until combined. Add raisins/dried cranberries/nuts, if using. Set aside.
  2. Core the apples: Use an apple corer or a sharp paring knife and a spoon. Cut around the core, about 3/4 down into the apple. Use a spoon to carefully dig out the core.
  3. Place cored apples in a baking pan with sides. Spoon filling into each apple p to the top.
  4. Pour water into the pan around the apples to cover the bottom.
  5. Bake for 40-45 minutes or until apples are to your desired softness.
  6. Remove apples from the oven and allow to rest 5 minutes. Serve warm.
Prep-Ahead Pumpkin Pie

For a traditional dessert you can make in advance

  • 1 Store-Bought Pie Dough

  • 3 Eggs, large

  • 15 oz can 2 cups pumpkin puree (not pie filling)

  • 1/2 cup your choice of milk

  • 1/2 cup maple syrup or honey

  • 1/2 tsp vanilla

  • 1.5 tsp pumpkin pie spice**

  • 1/4 tsp salt

**Make & store your own pumpkin pie spice in a jar by mixing 1/4 cup ground cinnamon, 1 Tbsp ground nutmeg, 1 Tbsp ground ginger and 1 tsp ground cloves

Instructions:

  1. Preheat oven to 350F
  2. In a medium bowl, add eggs and whisk for 30 seconds.
  3. Add pumpkin puree, milk, maple syrup, vanilla, pumpkin pie spice, salt and whisk together.
  4. Pour your pie filling into pre-baked crust and bake pie for 55 minutes.

Freeze & Store…

  1. Let the pie cool completely.
  2. Wrap the pie tightly in a few layers of plastic wrap.
  3. Label the pie with the freeze date and place in freezer.
  4. Thaw overnight in refrigerator before serving.

Crispy Zucchini Slices

Embrace summer squash season with this simple recipe great for snacking or side dishes!


Ingredients & Instructions
  • Non-stick cooking spray
  • 3 Zucchini
  • 1 TBSP Oil
  • 1/4  Cup Parmesan Cheese, grated
  • 2/3 Cup Cornflake Cereal Crumbs
  • Salt & Black pepper to taste

Instructions:

    1. Preheat oven to 450F. Lightly coat a baking sheet with non-stick cooking spray.
    2. Slice zucchini into ¼-inch thick rounds, no need to peel
    3. Place sliced zucchini into a large bowl and drizzle with oil. Toss with clean hands to coat all sides.
    4. In a small bowl, combine cheese, cereal crumbs, and black pepper.
    5. Press zucchini rounds into the parmesan mixture to coat each slice on both sides
    6. Place in a single layer on the prepared baking sheet. Bake until browned and crisp, about 10 minutes.
    Ingredientes & Instrucciones
    • Aerosol para cocinar antiadherente

    • 3 calabacines medianos a grandes

    • 1 cucharada de aceite de oliva

    • 1/4 taza de queso parmesano rallado

    • 2/3 taza de hojuelas de maíz trituradas

    • ⅛ cucharadita de sal pimienta

    • negra molida a gusto

    Instrucciones:

    1. Precalienta el horno a 450 grados.
    2. Cubre ligeramente una bandeja para hornear con aerosol para cocinar
    3. antiadherente.
    4. Corta el calabacín en rodajas gruesas de ¼ de pulgada sin quitar
    5. la piel verde.
    6. Coloca las rodajas en una bolsa de plástico resellable con aceite de oliva.
    7. Agita para cubrir por todos los lados.
    8. Mezcla el queso parmesano, el cereal triturado y la pimienta en un pequeño
    9. recipiente. Mete las rodajas de calabacín en la mezcla de parmesano;
    10. cubre ambos lados.
    11. Coloca una sola capa sobre una bandeja para hornear preparada.
    12. Hornea hasta que estén doradas y crujientes, durante unos 10 minutos.

    Sweet Potato Applesauce Muffins

    A naturally sweet treat for breakfast or a snack!


    Ingredients & Instructions
    • 1 1/3 Cup Unsweetened Applesauce

    • 2/3 Cup Sweet Potato, cooked & pureed

    • 1 ½ Cups Flour

    • ¼ tsp Salt

    • 2 tsp baking powder

    Instructions:

      1. Preheat oven to 350 degrees.
      2. In a large bowl, blend together the sweet potato, applesauce and the flour
      3. Grease a muffin tin & pour in the batter. Only fill each cup about 3/4 full.
      4. Bake for about 25 minutes or until a toothpick inserted into a muffin comes out clean.
      5. Cool for a few minutes in the pan before removing to cool completely on a wire rack.
      Ingredientes & Instrucciones
      • 1 1/3 taza de puré de manzana sin azúcar

      • 2/3 taza de camote, cocido y en puré

      • 1 ½ tazas de harina

      • ¼ de cucharadita de sal

      • 2 cucharaditas de levadura en polvo

      Instrucciones:

      1. Precalentar el horno a 350 grados.
      2. En un plato grande, mezcle la batata, el puré de manzana y la harina.
      3. Engrasar un molde para muffins y verter la masa. Solo llene cada taza aproximadamente 3/4 de su capacidad.
      4. Hornear durante unos 25 minutos o hasta que al insertar un palillo en un muffin salga limpio.- Dejar enfriar unos minutos en la sartén antes de retirar para que se enfríe completamente sobre una rejilla.

      Planting the Seeds: Encouraging a Stronger Relationship & Ownership over Food Resources

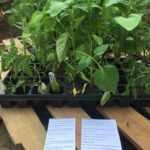
      Through two recent donations, JFCS is growing a program within our food pantry to encourage and empower clients to grow their own food. Recently, the agency was able to provide tomato plant seedlings to clients. JFCS agency has a relationship with Abe’s Acres Farm, located in Hightstown, where agency staff bring specific cardboard waste – collected through regular, large-scale food deliveries to the pantry – to the farm which is turned into composting material. In early May, when dropping off cardboard, Abe’s Acres provided 200 tomato plant seedlings for JFCS to share with pantry clients.

      Through an ongoing partnership with ONEProject, a Robbinsville-based organization, JFCS also received a donation of 250 painted planters and more seeds to provide our clients with additional resources.

      Why encourage clients to grow their own food?
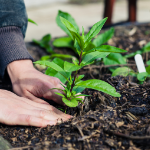
      Our clients are food insecure and low-income. One of the most basic advantages of growing one’s own produce is that it allows more, nutritious food to get onto the tables while saving money.

      Food pantries face significant challenges in acquiring perishable foods, especially produce, even when they have the means to keep these items stocked. The JFCS pantry houses multiple full-sized refrigerators and freezers as well as having refrigeration and freezer storage available on both mobile food pantry vehicles. Despite this, even our agency faces challenges when trying to keep fresh items stocked in the volume needed to service all our clients through both the on-site and mobile food pantries. By providing resources directly to clients, we can circumvent many of those challenges and allow the client to have food from the freshest and most primary source – the plant!

      The Importance of Access to Fresh Produce

      In a 2019 study by the CDC, 85% of food pantry clients said it was important to have fresh fruits and vegetables, but only 52% said these were always available. Food pantry clients’ fruit and vegetable consumption falls short of recommendations. In the same CDC study, about two-thirds of food pantry clients had a household member with a diet-related chronic disease. Poor nutrition can lead to increased risk for developing diet-related health conditions.

      JFCS prides itself on being a healthy, choice-pantry, but there is always room to improve. By encouraging donations from community members through their own gardens and giving our clients the tools to grow their own food, we are taking our healthy, choice-pantry to the next level.

      More than Fruits & Veggies

      The ONE Project donation included cilantro seeds. Herbs and spices are often overlooked as donations to food pantries but are essential for clients to secure their cultural foodways. By giving a planter or seed to grow an herb, our clients can choose what they want to grow beyond anything provided through our pantry.

      How Can You Help?

      JFCS is tying into the national Plant-a-Row initiative which encourages individuals to plant items in their personal or communal gardens for the specific purpose of harvesting to donate to local food pantries.

      The JFCS food pantry will accept donations from local gardens to be provided to our clients. In years past, the JFCS pantry has been able to accept limited donations of fresh produce but now with the mobile food pantry going out 3-5 times per week, there is significantly increased demand for a variety of fresh fruits and vegetables. The on-site food pantry also continues to see high use, with 80-100 visits per month.

      If you have questions about donating from your personal or community garden, reach out to Taryn Krietzman at TarynK@jfcsonline.org. For those outside of the Mercer County region, individuals can utilize the pantry finder on AmpleHarvest.com to locate a local food pantry accepting donations from personal or community gardens.

      Taryn Krietzman, RDN

      Carrot Cake Overnight Oats

      Enjoy this seasonal, spring time treat for breakfast or anytime!


      Ingredients & Instructions
      • 1 cup milk
      • 3/4 cup oats
      • 1 teaspoon maple syrup or honey
      • 1/4 Cup carrot, finely grated
      • 1 tablespoon raisins
      • Pinch of salt
      • Dash of cinnamon

      Optional:

      • 1/8 teaspoon vanilla
      • 1 Tbsp toasted nuts
      • 1 Tbsp shredded coconut

      Instructions:

      1. Make the night before you want to eat it. Mix all ingredients together thoroughly and place into the refrigerator.
      2. Wake up and enjoy!
      Ingredientes & Instrucciones
      • 1 taza de leche

      • 3/4 taza de avena

      • 1 cucharadita de jarabe de arce o miel

      • 1/4 taza de zanahoria finamente rallada

      • 1 cucharada de pasas

      • pizca de sal

      • pizca de canela

      Opcional:

      • 1/8 cucharadita de vainilla
      • 1 cucharada de nueces tostadas

      Instrucciones:

      1. ¡Haz la noche anterior a la que quieras comer!
      2. Mezcle bien todos los ingredientes y colóquelos en el refrigerador.
      3. ¡Despierta y disfruta!

      Asian-Style Rice Bowl with Fish Sticks

      Play around with your favorite flavors and textures to make a personalized rice bowl you love!


      Ingredients & Instructions
      • Fish sticks (~3 per person)
      • Rice (white or brown)
      • Seasoned Rice Vinegar (apple cider vinegar or lemon juice are okay too)
      • Carrots, Cucumber, Cabbage, Radishes (or any other crunchy vegetables you like)
      • Ginger Dressing
      • Optional Additions: Sliced Avocado, Diced Mango, Soybeans, Chopped Scallion, Spicy Mayo, Sesame Seeds, Soft-Boiled Egg, Etc.

      Instructions:

      1. Prepare rice as usual
      2. While the rice is cooking, shred/matchstick your crunchy vegetables and prepare the fish sticks according to package directions.
      3. Once the fish has cooled enough to handle, cut into bite-sized pieces. Place into a medium bowl and dress with a 2-3 teaspoons of ginger dressing. Toss to mix.
      4. Once the rice is finished cooking, fluff it with a fork and slowly mix in 2-3 TBSP of rice vinegar. Add more or less to your preference.
      5. To assemble, place 1/2 Cup of rice into a bowl. And fish and vegetables. Dress with personalized garnishes.
      6. Enjoy warm or cold!

      BONUS! Optional: Spicy Mayo

      • ½ cup mayo
      • 1 Tbsp Sriracha
      • 1 tsp rice or apple cider vinegar
      • 1/8 tsp sesame oil

      Whisk together and store in refrigerator.

      Ingredientes & Instrucciones

      ¡Juega con tus sabores y texturas favoritos para hacer un tazón de arroz personalizado que te encanta!

      • Palitos de pescado (~ 3 por persona)
      • Arroz (blanco o integral)
      • Vinagre de arroz condimentado (vinagre de sidra de manzana o jugo de limón también están bien)
      • Zanahorias, pepino, repollo, rábanos (o cualquier  verdura crujiente que le guste)
      • Aderezo de jengibre
      • Adiciones opcionales: rodajas de aguacate, cubitos de mango, cebolleta picada, mayonesa picante, semillas de sésamo, huevo pasado por agua, etc.

      Instrucciones:

      1. Prepare el arroz como de costumbre.
      2. Mientras se cocina el arroz, triture o pegue las verduras crujientes y prepare los palitos de pescado de acuerdo con las instrucciones del paquete.
      3. Una vez que el pescado se haya enfriado lo suficiente como para manipularlo, córtelo en trozos pequeños. Coloque en un tazón mediano y aliñe con 2-3 cucharaditas de aderezo de jengibre. Mezcle.
      4. Una vez que el arroz haya terminado de cocinarse, revuélvalo con un tenedor y mezcle lentamente
        2-3 cucharadas de vinagre de arroz. Agregue más o menos, a su preferencia.
      5. Coloque 1/2 taza de arroz en un tazón. Agregue su pescado y verduras encima en secciones separadas. Vístase con sus aderezos personalizados en la parte superior
      6. ¡Disfrute caliente o frío!

      Opcional: Mayonesa Picante

      • 1/2 taza de mayonesa 
      • 1 cucharada de sriracha 
      • 1 cucharadita de vinagre de sidra de arroz o de manzana 
      • 1/8 cucharadita de aceite de sésamo

      Batir y guardar en el refrigerador.

      Breaded fish sticks don’t conjure an image of “health,”, but there are positives to seafood consumption despite the means.

      • The Dietary Guidelines for Americans 2020-2025 recommends eating a variety of animal and plant protein foods. The recommendation for seafood is about 8oz weekly. However, fish and shellfish intake among Americans is only an average of 2.7oz per week.

        The FDA recommends choosing fish that are lower in mercury. Fish sticks typically are made from whitefish such as cod, pollock, haddock or hake. These fish are all considered “Best Choices” (by the FDA) for avoiding mercury. This is especially important for young children.

      • Seafood provides important nutrients such as: Protein, Healthy omega-3 fats (DHA and EPA), vitamin B12 and vitamin D, Iron, selenium, zinc, and iodine.
      • Introducing seafood early may lead to greater food acceptance of seafoods into adulthood.

      Los palitos de pescado empanizados no evocan una imagen de “salud”, pero el consumo de mariscos tiene aspectos positivos a pesar de los medios.

      • Los lineamientos dieteticos para Americanos 2020-2025 recomienda comer una variedad de alimentos con proteínas animales y vegetales. La recomendación de mariscos es de aproximadamente 8 oz por semana. Sin embargo, la ingesta de pescado y mariscos entre los estadounidenses es solo un promedio de 2.7 oz por semana.
      • La FDA recomienda elegir pescados con bajo contenido de mercurio. Los palitos de pescado suelen estar hechos de pescado blanco como el bacalao, el abadejo, el eglefino o la merluza. Todos estos pescados son considerados “Mejores opciones” (por la FDA) para evitar el mercurio. Esto es especialmente importante para los niños pequeños.
      • Los mariscos proporcionan nutrientes importantes como: proteínas, grasas omega-3 saludables (DHA y EPA), vitamina B12 y vitamina D, hierro, selenio, zinc y yodo.
      • La introducción temprana de mariscos puede conducir a una mayor aceptación de los mariscos en la edad adulta.

      Toaster Oven Muffins

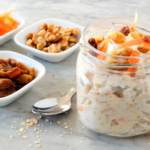
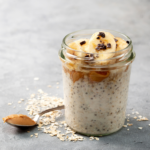
      Make muffins without the oven! Try this healthy breakfast or snack that’s easy to take on-the-go!

      Ingredients & Instructions
      • 1/3 cup Milk
      • 1/2 cup Oats
      • 1/2 cup Flour
      • 1/2 tsp Baking Powder
      • 1/4 tsp Baking Soda
      • 1 tsp Cinnamon
      • 1/4 tsp Salt
      • 1 Egg
      • 3 TBSP Plain Yogurt
      • 2 TBSP Oil
      • 2 TBSP Honey
      • 1/3 cup Raisins

      Instructions:

      1. Combine the oats and milk and let sit ~20 min to absorb.
      2. Preheat toaster oven to 375°F. Spray a 6-cup muffin tin with cooking oil (make sure it fits in your toaster).
      3. In another bowl, mix the flour, baking powder, baking soda, salt, cinnamon and raisins.
      4. Add egg, yogurt, oil, and honey to the oat mixture then stir to combine.
      5. Add the wet ingredients to the dry ingredients & stir
      6. Divide batter evenly among the muffin cups and bake ~12 minutes or until golden.
      Ingredientes & Instrucciones

      ¡Prepara magdalenas sin horno! ¡Pruebe este desayuno o refrigerio saludable que es fácil de tomar para llevar!

      • 1/3 taza de leche
      • 1/2 taza de avena
      • 1/2 taza de harina
      • 1/4 cucharadita de bicarbonato de sodio
      • 1/2 cucharadita de polvo de hornear
      • 1 cucharadita de canela
      • 1/4 cucharadita de sal
      • 1 huevo
      • 2 cucharadas de aceite
      • 2 cucharadas de miel
      • 3 cucharadas de yogur natural
      • 1/3 taza de pasas

      Instrucciones:

      1.  Combine la avena y la leche y deje reposar ~ 20 minutos para absorbar.
      2. Precaliente el horno tostador a 375 ° F. Rocíe un molde para muffins de 6 tazas con aceite de cocina (asegúrese de que quepa en su tostadora).
      3. En otro bol, mezcle la harina, el polvo de hornear, el bicarbonato de sodio, la sal, la canela y las pasas.
      4. Agregue huevo, yogur, aceite y miel a la mezcla de avena y luego revuelva para combinar.
      5. Agregue los ingredientes húmedos a los ingredientes secos y revuelva
      6. Divida la masa uniformemente entre los moldes para muffins y hornee ~ 12 minutos o hasta que esté dorado.

      Día de Acción de Gracias

      Estarás AGRADECIDO por estos consejos económicos y que ahorran tiempo para el Día de Acción de Gracias

      El Día de Acción de Gracias es un momento emocionante para comer algunas de nuestras comidas  favoritas. Podríamos seguir hablando sobre la comida del Día de Acción de Gracias, ¡pero la realidad es que preparar demasiados platos puede ser estresante! Consulte los siguientes consejos para gastar menos tiempo y dinero en la cocina.

      1. Manténgalo simple centrándose en los favoritos: elija sus 2 guarniciones de verduras favoritas y 1-2 guarniciones con almidón para preparar y disfrutar sin exagerar. ¡Puedes preparar otros platos cualquier día del año sin la presión del gran día!
      2. Haga solo lo que necesite: las sobras del Día de Acción de Gracias son excelentes, pero comprar demasiado puede exceder el presupuesto y generar desperdicio.
      3. Lo básico es lo mejor: a menudo, nuestras recetas favoritas son las más simples. Elija recetas sin ingredientes adicionales. Esto ahorra tiempo comprando Y en la cocina. Hacer platos desde cero también suele ser menos costoso.

      Cuando se trata de Acción de Gracias, ¡pensar en el futuro puede salvar el día!

      Darnos tiempo para decidir qué es realmente importante minimiza el estrés de las fiestas. La priorización puede mantenernos enfocados y encaminados para mantenernos dentro del presupuesto y tomar decisiones más saludables.

      1. Priorice sólo algunos de sus platos favoritos “imprescindibles” y elija recetas con anticipación. Puedes hacer otros platos cualquier día del año.
      2. Compre los productos de temporada de noviembre mientras estén al precio más bajo y en su punto máximo de frescura (calabazas de invierno, coles, repollo, batata, col rizada, zanahorias, manzanas, coliflor, coles de Bruselas, arándanos, etc.)
      3. Adelante. Programe un día de preparación en el que pueda preparar algunos alimentos con anticipación. Muchos se pueden almacenar en el congelador durante semanas y solo necesitan recalentarse (sopa, guisos, pastel, etc.)
      4. Use una olla de cocción lenta si tiene una. Muchas recetas se pueden adaptar para hacerlas en una olla de cocción lenta. Ocupa poco espacio y reduce el tiempo de cocción activo.
      5. Intercambio de aves de corral. El pavo suele ser el artículo más caro en Acción de Gracias. Reduzca el costo al:
      • Compra de pavo con marca de tienda
      • Elegir un pájaro más pequeño y centrarse en las guarniciones
      • Sustituye el pollo y prepáralo con el mismo cuidado que lo harías para un pavo
      • Comprar trozos de pavo en lugar del ave entera
      Pechuga De Pavo Asada

      Para cuando no quieras cocinar un pájaro entero (¡pruébalo con pollo!)

      • 5 libras de pechuga de pavo, con hueso y piel con
      • 2 cucharadas de mantequilla, suavizada
      • 2 dientes de ajo grandes, picados
      • 1 cucharada de romero
      • 1 cucharadita de pimentón ahumado
      • 2 cucharaditas de sal
      • Pimienta Negra, al gusto
      • 3 tazas de Agua

      Instrucciones:

      1. Precaliente el horno a 450 grados F.
      2. En un tazón pequeño, agregue la mantequilla ablandada, el ajo, el romero, el pimentón ahumado, la sal y la pimienta. Mezclar bien.
      3. Frote la pechuga de pavo con mantequilla sazonada por todos lados, comenzando desde el fondo con el lado del hueso.Coloque la pechuga de pavo hacia arriba en una rejilla y luego coloque la rejilla dentro de la fuente para hornear. Vierta agua en la sartén debajo del pavo.
      4. Hornee sin tapar durante 20 minutos en una rejilla inferior.
      5. Cubra sin apretar con papel de aluminio y hornee por 70 a 80 minutos más o hasta que la temperatura interna en la parte más profunda de la carne alcance los 150 a 155 grados F.
      Salsa de arándanos

      Para una salsa más endulzada naturalmente

      • 12 oz de arándanos, frescos o congelados
      • 1/3 taza de jarabe de arce o miel
      • 1/4 taza de jugo de naranja (use la ralladura de naranjas si son frescas)
      • 1/8 cucharadita de vainilla (opcional)
      • 1/8 cucharadita de canela (opcional)

      Instrucciones:

      1. Agregue arándanos, almíbar o miel y jugo de naranja en una olla.
      2. Cubra y deje hervir. Luego reduzca el fuego a medio y cocine por 6 minutos más.
      3. Retire la tapa y agregue vainilla y canela (opcional). Revuelva y cocine por otros 3 minutos o hasta que los arándanos se rompan y la salsa se espese.
      Calabaza Bellota Rellena de Acción de Gracias

      Para un nuevo plato para servir con verduras de temporada.

      Para la calabaza:

      • 3 calabaza bellota, pequeña
      • 1 cucharada de aceite de oliva
      • sal y pimienta, al gusto

      Para el relleno:

      • 1 cebolla picada
      • 3 dientes de ajo picados
      • 1 cucharada de aceite de oliva
      • 1 libra de pavo magro, molido
      • 3 tazas de espinaca / col rizada, picada
      • 2 cucharaditas de romero seco
      • Sal y pimienta al gusto
      • Queso duro y perejil para decorar (opcional)

      Instrucciones:

      1. Corta la calabaza por la mitad y saca las semillas. (guárdalos para brindar más tarde)
      2. Coloque la calabaza con el lado cortado hacia arriba en una bandeja para hornear grande. Cepille con 1 cucharada de aceite y espolvoree con sal y pimienta. Hornea por 30 minutos.
      3. Mientras tanto, prepara el relleno. Coloque una sartén grande a fuego medio-bajo.
      4. Agregue aceite de cebolla y ajo y cocine hasta que estén transparentes y fragantes. Agregue el pavo y cocine por otros 7-8 minutos mientras mezcla y rompe la carne.
      5. Agrega los ingredientes restantes. Mezclar y cocinar por unos minutos más.
      6. Después de que las calabazas se hayan asado durante 30 minutos, sácalas del horno. Rellene con cuidado los centros con el relleno y espolvoree queso (opcional).
      7. Regrese la calabaza rellena al horno y hornee otros 25-30 minutos hasta que la parte superior esté dorada y la calabaza se pueda perforar fácilmente con un tenedor.
      Semillas de calabaza bellota tostadas

      Para un bocadillo crujiente y salado mientras espera la cena.

      • Semillas de calabaza bellota
      • Aceite de su elección, suficiente para cubrir ligeramente
      • Sal al gusto

      Instrucciones:

      1. Caliente el horno a 350F y cubra una bandeja para hornear con papel de aluminio.
      2. Quite la pulpa de calabaza de las semillas lo mejor que pueda.
      3. En un tazón, rocíe aceite sobre las semillas para que se cubran ligeramente. Agrega sal y mezcla.
      4. Extienda las semillas en su bandeja para hornear en una sola capa y colóquelas en el horno.
      5. Hornee durante 15-20 minutos, mezclando las semillas con una espátula una o dos veces durante el tiempo de cocción.
      6. Retirar una vez que estén dorados y fragantes.
      Ejotes verdes con ajo

      Para una guarnición de verduras deliciosamente sencilla.

      • 1.5 libras de ejotes verdes fresco, con las puntas recortadas
      • 3 cucharadas de agua
      • 2 cucharadas de aceite de olive
      • 3-4 dientes de ajo picados
      • Sal y Pimienta Negra al gusto

      Instrucciones:

      1. Precaliente una sartén grande de cerámica antiadherente a fuego medio.
      2. Agregue las judías verdes y 3 cucharadas de agua. Tape y cocine por 4 minutos.
      3. Retire la tapa y si queda agua, cocine las judías verdes hasta que el agua se haya evaporado.
      4. Empuje los frijoles hacia un lado. Agrega aceite de oliva y ajo. Cocine por 30 segundos y luego revuelva con las judías verdes. Sazone con sal y pimienta.
      Coles de Bruselas asadas

      Para un acompañamiento tradicional y sencillo de verduras de temporada.

      • 2 libras de coles de Bruselas, frescas
      • 3 cucharadas de aceite de olive
      • Sal y Pimienta Negra al gusto

      Instrucciones:

      1. Precaliente el horno a 400 grados F y cubra una bandeja para hornear con papel de aluminio.
      2. Recorta los extremos y quita las hojas exteriores de las coles de Bruselas.
      3. Coloque las coles de Bruselas en una bandeja para hornear, rocíe con aceite de oliva, espolvoree con sal y pimienta.
      4. Mezclar con las manos para cubrir uniformemente con aceite y condimentos. Extienda en una sola capa.
      5. Hornee durante 40 minutos, revolviendo con una espátula 1-2 veces después de la marca de 30 minutos.
      Puré de papas en olla de cocción lenta

      Para una receta de olla lenta sin complicaciones (¡pruébalo con batatas!)

      • 5 libras de papas, peladas y cortadas en cubos de 1 pulgada
      • 1/2 taza de leche baja en grasa o de origen vegetal
      • 1/2 taza de caldo bajo en sodio
      • 3 dientes de ajo, triturados
      • 1/3 taza de yogur griego natural
      • 1/4 taza de queso parmesano rallado
      • Sal y Pimienta Negra al gusto
      • Cebollas verdes en rodajas o cebollino para decorar (opcional)

      Instrucciones:

      1. Coloque los cubos de papa junto con la leche, el caldo, la sal, la pimienta negra y el ajo en una olla de cocción lenta. Mezcle para combinar.
      2. Cubra la olla y cocine durante aproximadamente 3-4 horas a temperatura alta o 6-8 horas a temperatura baja.
      3. Cuando las papas estén tiernas, tritúralas directamente en la olla de cocción lenta hasta obtener la consistencia deseada.
      4. Agregue el yogur y el parmesano rallado y sazone al gusto.
      5. Coloque la tapa nuevamente en la olla de barro y caliente durante otros 15-20 minutos antes de servir. Adorne si lo desea.
      Sopa de calabaza

      Para una abundante sopa de temporada que puede preparar con anticipación (¡pruebe con cualquier calabaza del invierno!)

      • 2 cucharadas de aceite
      • 1 cebolla, picada
      • 1 tallo de apio, picado
      • 1 Zanahoria mediana, picada
      • 32 oz Caldo bajo en sodio
      • Sal y pimienta negra, al gusto
      • 1 calabaza, pelada, sin semillas y en cubos (guarde las semillas para tostar más tarde)

      Instrucciones:

      1. Agregue aceite a una olla grande para sopa. Agregue la cebolla, el apio, la zanahoria y la calabaza y cocine por 5 minutos o hasta que estén ligeramente dorados.
      2. Vierta suficiente caldo de pollo para cubrir las verduras. Luego reducir a fuego lento y tapar. Cocine a fuego lento durante 40 minutos o hasta que todas las verduras estén tiernas.
      3. Con cuidado, transfiera la sopa a una licuadora (o use una licuadora de inmersión) y mezcle hasta que quede suave.
      4. Mezcle el caldo restante para lograr la consistencia deseada. Condimentar con sal y pimienta.

      para congelar

      1. Deje que la sopa se enfríe y luego vierta en un recipiente apto para congelador. Deje espacio en la parte superior para la expansión.
      2. Coloque en el congelador hasta que esté listo para usar.
      3. Descongele durante la noche en el refrigerador si lo desea. Vuelva a calentar en una olla en la estufa

      No-Bake Cereal Bars

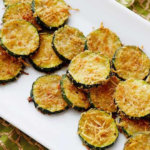
      Looking for a DIY project? A healthy snack? A break from virtual learning? Try these easy & tasty 3-ingredient, no-bake bars! These healthy treats feature peanuts which contain healthy fats, fiber & plant-based protein!


      Ingredients & Instructions
      • 3 cups Cheerios cereal
      • 1/2 cup peanut butter
      • 1/3 cup honey

      Instructions:

      1. Line an 8x8in pan with parchment paper.
      2. Combine peanut butter & honey in a saucepan & set over medium heat.
      3. Heat & stir continuously until mixture just starts to simmer (2-3 minutes)
      4. Remove from heat & stir until mixture is smooth.
      5. Stir in cereal until evenly coated.
      6. Pour mixture into prepared pan & spread evenly.
      7. Chill in the refrigerator for 1 hour.
      8. Cut into bars.
      Ingredientes & Instrucciones

      ¿Busca un proyecto? ¿Un bocadillo saludable? ¿Un descanso del aprendizaje virtual? ¡Prueba esta fácil y sabrosa receta de 3 ingredientes sin hornear! Estas golosinas saludables contienen cacahuetes que contienen grasas saludables, fibra y proteínas vegetales.

      • 3 tazas de cereal Cheerios
      • 1/2 taza de mantequilla de maní
      • 1/3 taza de miel

      Instrucciones:

      1. Cubra un molde de 8×8 pulgadas con papel de parche.
      2. Combine la mantequilla de maní y la miel en una cacerola y cocine a fuego medio.
      3. Caliente y revuelva continuamente hasta que la mezcla comience a hervir a fuego lento (2-3 minutos)
      4. Retire del fuego y revuelva hasta que la mezcla esté suave.
      5. Agregue el cereal hasta que esté uniformemente cubierto.
      6. Vierta la mezcla en el molde preparado y esparza uniformemente.
      7. Enfriar en el refrigerardo por 1 hora.
      8. Cortar en barras.

      Peanut Butter & Jelly Overnight Oats

      5 minutes at night for a healthy morning start!

      Ingredients & Instructions
      • 1 Cup Oats

      • 1 Cup Milk

      • 4 Tablespoon Peanut Butter

      • 4 Tablespoon Jelly

      Instructions:

      1. Mix all ingredients together in the evening.
      2. Let sit in the refrigerator overnight
      3. Enjoy in the morning. That’s IT!

      Add in your favorite ingredients to personalize your breakfast! Try walnuts, pumpkin seeds, honey, cinnamon, dark chocolate, berries, or bananas.

      Ingredientes & Instrucciones

      5 minutos por la noche para comenzar una mañana saludable.

      • 1 Taza de Avena

      • 1 Taza de Leche

      • 4 Cucharadas de Mantequilla de Maní

      • 4 Cucharadas de mermelada

      Instrucciones:

      1. Mezcle todos los ingredientes por la noche.
      2. Deje reposar en el refrigerador durante la noche.
      3. Disfrute por la mañana. ¡Eso es!

      ¡Agregue sus ingredientes favoritos para personalizar su desayuno! Pruebe nueces, semillas de calabaza, miel, canela, chocolate negro, bayas o banana.